Epoxy finishes with a clear, glossy surface, and confers professional beauty to any project. Bond Craftor Epoxy Resin provides users with an ideal solution to create smooth glass-like surfaces on tables, pieces of art, and jewelry designs. People commonly encounter bubbles, cloudiness, and uneven textures while working with epoxy resin. Proper techniques enable users to achieve perfect, crystal-clear epoxy resin finishes with each application. The guide presents step-by-step instructions on mixing and correctly pouring epoxy resin to achieve outstanding curing results. With patience and attention to detail, any project can have a flawless and durable clear craft epoxy coating.
Preparing the Surface
Before starting epoxy resin work, one must maintain a clean and dustless working environment. Material contamination in the form of surface dirt will result in imperfections throughout the finished product. The surface receives cleaning with a damp cloth that leads to complete drying until it becomes ready for resin application. A smooth application of epoxy on wood requires first sanding the wood surface to boost the adhesive properties. Fine-grit sandpaper produces satisfactory results for this task. After smoothing the surface down, clean it to eliminate the remaining dust. Allowing the surface to dry completely before pouring the resin is crucial to avoid issues during curing.
Measuring and Mixing Properly
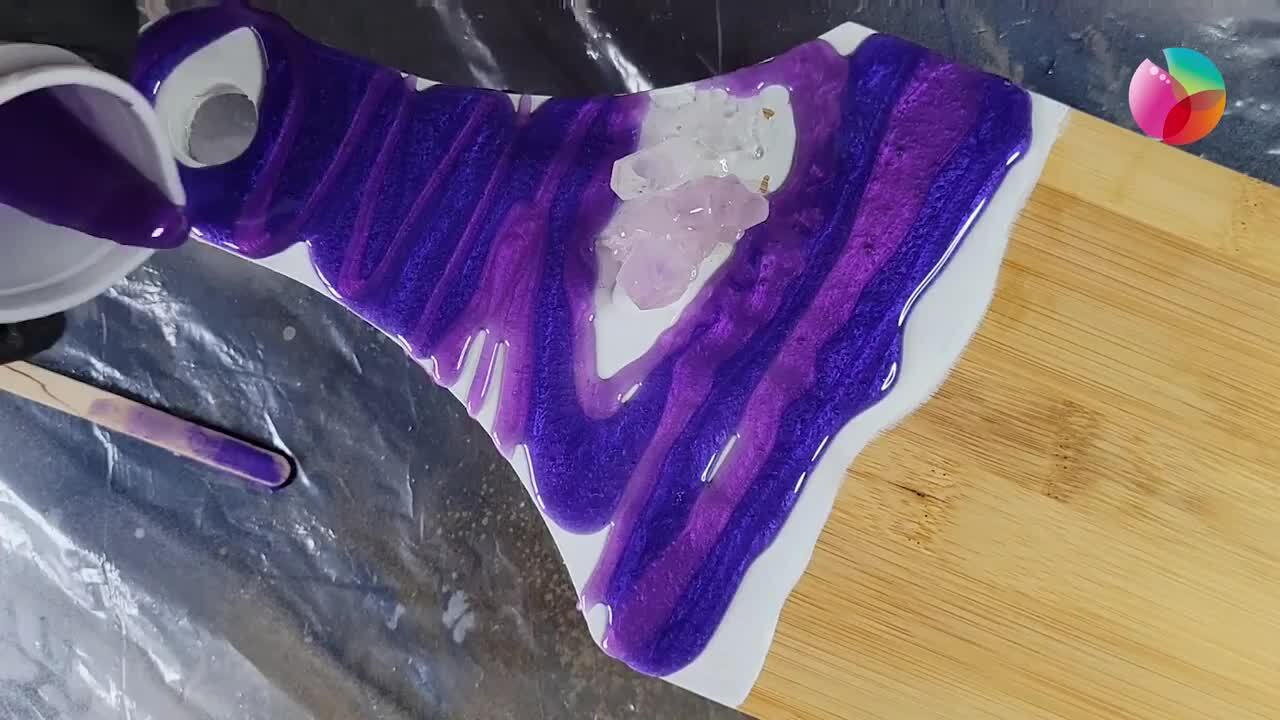
The proper mixture of epoxy resin is the fundamental step to achieve clear finishes successfully. Using Bond Craftor Epoxy requires following the provided measurement directions for resin and hardener components. Proper measurements produce the right resin cure state that eliminates both stickiness and cloudiness. Slow and even mixing of the blend prevents bubble formation. You should use a mixing motion to scrape all sides and the bottom of the container so the mixture becomes thoroughly combined. The resin will develop tiny bubbles when mixed at a too high speed because trapped air remains inside the mixture. Letting the mixture rest for a minute after stirring can help bubbles rise to the surface before pouring.
Pouring with Care
Slowing down the resin pouring process leads to a flat surface. The resin should be poured from the middle of the flat surface while it spreads naturally. A plastic spreader or brush helps direct resin when needed. When pouring deep resin layers, you should apply multiple thin layers to reduce bubble formation while maintaining a safe temperature range. Before adding new ones, sufficient curing time must pass between layers.
Removing Air Bubbles
After proper mixing and pouring procedures, some air bubbles might remain visible in the resin material. A light application of heat from a heat gun or torch will remove bubbles that appear on the surface. The heated resin leads bubbles to ascend until they burst, creating a transparent surface finish. A toothpick is an alternative tool to eliminate visible bubbles when neither heat guns nor torches are available. Spraying a fine mist of rubbing alcohol onto the resin surface helps break bubbles through its application.
Keeping the Workspace Clean
Epoxy resin needs proper attention because dust and debris particles will settle onto the surface, creating visible finish defects. Putting the curing resin under a plastic sheet or inside a dust-controlled area helps maintain surface cleanliness. Strong airflow in the workspace should be prohibited because it allows dust particles to settle on the curing resin.
Allowing Proper Curing Time
Complete curing of epoxy resin requires an adequate amount of time. Premature completion of the process might result in sticky and uneven surface results. The curing process of Bond Craftor Epoxy Resin demands a minimum waiting period of 24 hours without disturbance. The curing time shortens in warm, dry conditions but becomes longer in cold temperatures. The project must not be touched or moved prematurely because fingerprints or dents will appear on the finish. Waiting until the resin is tough ensures a strong and durable surface.
Sanding and Polishing for Extra Shine
If the resin surface has minor imperfections, sanding and polishing can help improve the finish. Wet sanding with fantastic sandpaper smooths out any rough areas. After sanding, polishing with a soft cloth and a polishing compound brings back the shine. A buffing machine can be used for an extra glossy look. This step is optional but helps achieve a perfect crystal-clear finish.
Conclusion
The proper methods allow epoxy resin to achieve an outstanding clear finish. A perfect outcome stems from correctly preparing surfaces and blending resin while feeding it in at a controlled pace to remove bubbles. Long resin curing duration and a clean workspace are the two main factors producing successful outcomes. Bond Craftor Epoxy Resin delivers a powerful, resilient, transparent finish that boosts any work project. The combination of patience and careful details allows anyone to obtain crystal-clear epoxy finishes successfully.